
The other day I found myself with no internet connection at home. A storm had come through that night, and knocked the whole area out. So, I had to find another location to work for the day. I found solace at a nearby Starbucks, and I figured all would be fine. The problem was, the type of work I do requires that I have a handful of virtual machines on my laptop with some non-standard networking between them, and enabling the firewall on macOS broke it all. Normally, when I'm at home, I just have the macOS firewall disabled because I'm located safely behind my home firewall on my own network segment.
That was the moment that I realized that my work was not as mobile as I thought it was. I needed a solution.
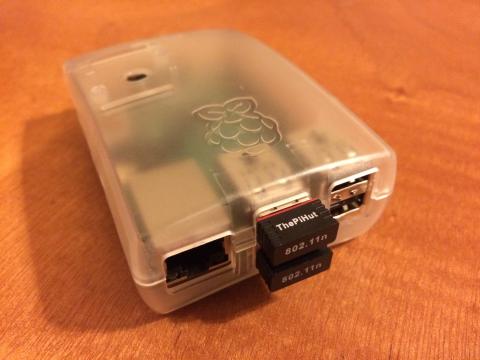
I happened to have an extra Raspberry Pi Model B+ laying around, along with a couple of USB wifi adapters for it. I decided to see what I could do with it to create my own wifi bridge/firewall, and it works quite well! The overall idea is to have one wifi adapter acting as an access point that my computer connects to, and the other acting as a client connected to whichever wifi network is available. Supporting services include dnsmasq for DHCP and a local caching DNS server, and some iptables rules to safely glue the two interfaces together.
Base System
The base system is simply the latest Raspbian Lite, found at https://www.raspberrypi.org/downloads/raspbian/. At the time of this writing, the latest stable version was Jessie, or 8.0. After installing the base image, install all of the available patches.
sudo apt-get update
sudo apt-get upgrade
Networking
I chose to use wlan0 as the wifi client, and wlan1 as the access point. The iptables rules are relatively simple, so something like ferm was overkill. I just put the rules directly in the network interface configuration. I chose 192.168.9.0/24 because I have 8 other networks allocated at home, and this one would not conflict. Any RFC-1918 subnet will work just fine, though. Just keep in mind that if you choose a common network, like 192.168.0.0/24 or 192.168.2.0/24 or even 10.0.0.0/8 (more common than I like to think about), you will end up with trouble routing, and will have to choose a new internal network on the fly to make things work.
/etc/network/interfaces
auto lo
iface lo inet loopback
    pre-up iptables -P INPUT DROP
    pre-up iptables -P FORWARD DROP
    pre-up iptables -A INPUT -f -j DROP
    pre-up iptables -A INPUT -i lo -j ACCEPT
    pre-up iptables -A INPUT -m conntrack --ctstate RELATED,ESTABLISHED -j ACCEPT

iface eth0 inet manual

allow-hotplug wlan0
iface wlan0 inet manual
    wpa-conf /etc/wpa_supplicant/wpa_supplicant.conf
    pre-up echo 1 > /proc/sys/net/ipv4/ip_forward
    pre-up iptables -A FORWARD -i wlan1 -o wlan0 -j ACCEPT
    pre-up iptables -A FORWARD -m conntrack --ctstate RELATED,ESTABLISHED -j ACCEPT
    pre-up iptables -t nat -A POSTROUTING -o wlan0 -j MASQUERADE
    post-down echo 0 > /proc/sys/net/ipv4/ip_forward
    post-down iptables -D FORWARD -i wlan1 -o wlan0 -j ACCEPT
    post-down iptables -D FORWARD -m conntrack --ctstate RELATED,ESTABLISHED -j ACCEPT
    post-down iptables -t nat -D POSTROUTING -o wlan0 -j MASQUERADE

allow-hotplug wlan1
iface wlan1 inet static
    address 192.168.9.1/24
    pre-up iptables -A INPUT -i wlan1 -j ACCEPT
    post-down iptables -D INPUT -i wlan1 -j ACCEPT
Wi-FI Access Point
I used the hostapd package to provide access point capabilities. Install it with
sudo apt-get install hostapd
Add the following line to /etc/default/hostapd
DAEMON_CONF="/etc/hostapd/hostapd.conf"
And, configure the access point in `/etc/hostapd/hostapd.conf. I chose the super-original SSID of "Raspberry", but name it whatever you want. Also, be sure to set a proper WPA passphrase.
interface=wlan1
driver=nl80211
hw_mode=g
channel=6
ieee80211n=1
ap_isolate=1
ssid=Raspberry
own_ip_addr=192.168.9.1
wpa=2
wpa_passphrase=supersecretWPApassword
wpa_key_mgmt=WPA-PSK
wpa_pairwise=TKIP CCMP
rsn_pairwise=CCMP
DHCP and DNS
Both DHCP and DNS services are provided by dnsmasq. Install it with
sudo apt-get install dnsmasq
Configure DHCP for wan1 by creating a file at /etc/dnsmasq.d/raspberry.conf with the following content
interface=wlan1
dhcp-range=interface:wlan1,192.168.9.51,192.168.9.99,2h
Wi-Fi Client
Getting wlan0 to connect to a wifi network can be done a few different ways. Either add the network manually to /etc/wpa_supplicant/wpa_supplicant.conf, or use a combination of the followingwpa_cli` commands. Start by running wpa_cli from an ssh session to the raspberry pi
ssh pi@192.168.9.1
wpa_cli
View available networks
> scan
OK
<3>CTRL-EVENT-SCAN-STARTED
<3>CTRL-EVENT-SCAN-RESULTS
> scan_results
bssid / frequency / signal level / flags / ssid
00:0f:60:05:01:70   2437    -19 [WPA2-PSK-CCMP][ESS]    Raspberry
30:85:a9:6b:66:52   2412    -49 [WPA2-PSK-CCMP][ESS]    chavet.net
32:85:a9:6b:66:53   2412    -49 [WPA2-PSK-CCMP][ESS]    chavet.guest
32:85:a9:6b:66:55   2412    -49 [WPA2-PSK-CCMP][ESS]    tweedles
32:85:a9:6b:66:57   2412    -49 [WPA2-PSK-CCMP][ESS]    chavet.kids
Use one of the available networks
> add_network
2
> set_network 2 ssid "tweedles"
OK
> set_network 2 psk “XXXXXXXXXXXX”
OK
> select_network 2
OK
<3>CTRL-EVENT-DISCONNECTED bssid=30:85:a9:6b:66:52 reason=3 locally_generated=1
<3>CTRL-EVENT-REGDOM-CHANGE init=CORE type=WORLD
<3>CTRL-EVENT-SCAN-STARTED
<3>CTRL-EVENT-SCAN-RESULTS
<3>WPS-AP-AVAILABLE
<3>CTRL-EVENT-SCAN-STARTED
<3>CTRL-EVENT-SCAN-RESULTS
<3>WPS-AP-AVAILABLE
<3>SME: Trying to authenticate with 32:85:a9:6b:66:55 (SSID='tweedles' freq=2412 MHz)
<3>Trying to associate with 32:85:a9:6b:66:55 (SSID='tweedles' freq=2412 MHz)
<3>Associated with 32:85:a9:6b:66:55
<3>WPA: Key negotiation completed with 32:85:a9:6b:66:55 [PTK=CCMP GTK=CCMP]
<3>CTRL-EVENT-CONNECTED - Connection to 32:85:a9:6b:66:55 completed [id=2 id_str=]
Show saved networks
> list_networks
network id / ssid / bssid / flags
0   chavet.guest    any [DISABLED]
1   chavet.net  any [DISABLED]
2   tweedles    any [CURRENT]
Save current config
Saves the current list of networks, and their passphrases to /etc/wpa_supplicant/wpa_supplicant.conf. Only do this if you really want to remember the network(s) you just configured. Typically, I don't save the networks because I only use this in public wi-fi locations, and don't need to remember any passphrases, etc.
> save_config
OK
Security
One last thing that is generally good practice is to add your SSH public key to the raspberry pi, and disable password authentication by adding the following to /etc/ssh/sshd_config
PasswordAuthentication no
The firewall rules added above prevent SSH access from anywhere except the internal network, but it never hurts to be safe.
Power
The Raspberry Pi runs on a simple USB connection. Either use an external battery and keep this in your bag, or plug it in to your laptop's USB port. I typically do the latter.
That's It!
I've only done a little testing with this setup so far, and it seems to work pretty well. I imagine that a Raspberry Pi 2, or 3, would provide better performance, but I didn't have an extra one of either of those for tinkering. If this becomes a go-to tool for me, I'll likely upgrade it to a Raspberry Pi 3.
VPN
Another thing I want to tinker with as time allows is to have the raspberry pi automatically connect to a VPN so all of my traffic is automatically protected from would-be local snoops. From what little I've read, though, the Raspberry Pi 1 B+ can only handle about 3MB/s of throughput using OpenVPN, which is probably not going to cut it. So, for now, I'll let my laptop do the VPN heavy lifting, and let the Raspberry Pi just push packets around.